- ONLY ADMINISTRATORS CAN CREATE COMPANIES. FOR HELP WITH COMPANIES, PLEASE CONTACT YOUR SYSTEM ADMINISTRATOR
To create a company in the system, you must be logged in as a System Administrator. Make sure that the Company Administrator Slide Bar at the right of the page header is slid to the left. If Company Administrator Slide Bar is to the right, slide it to the left to enter Super Admin role. (Click “Switch to Super Admin” button in popup).
Note – you will only see the Company Administrator Slidebar if you are logged in as an Administrator.

Once in the Super Admin Role, select Companies from the Navbar on the left. This will take you to the Company Overview List screen.
Select the green “Create Company” button at the top right of the overview screen.
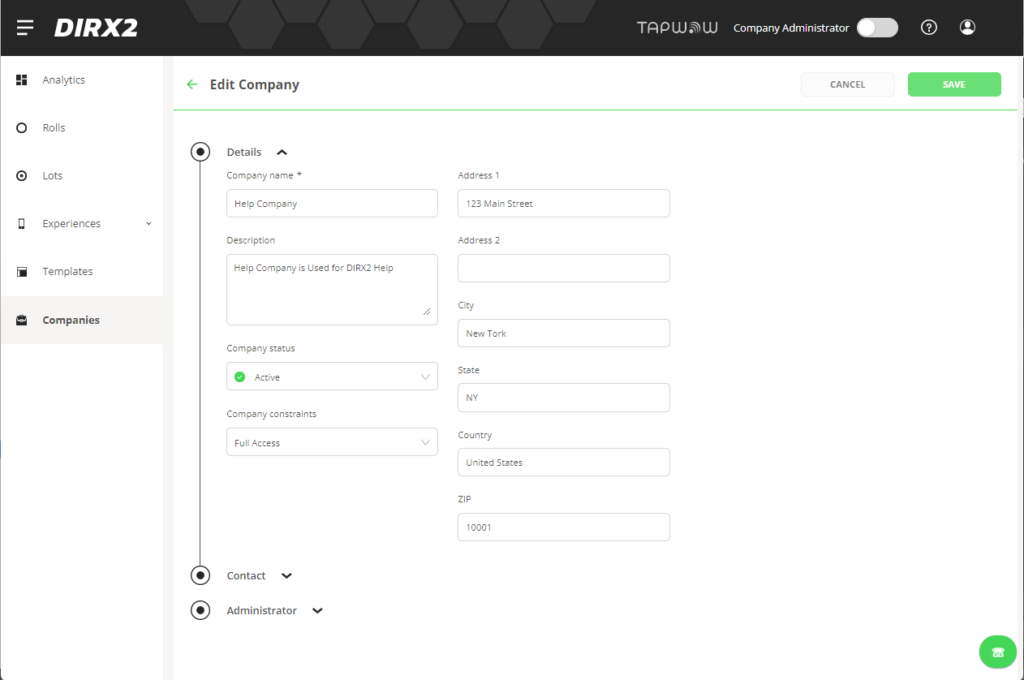
On the Company Information Screen, enter any information for the company that you are creating in the “Details” section. The company information entered in the data fields are for use by System Administrators to describe the company as well as any contacts. Enter all the necessary information in order to contact someone with the Company.

Each Company within the system has a few status fields that need to be maintained: Company Status and Company Constraints.
Company Status
Company Status represents whether a company is active in the system. While a company is being setup in the system, you can leave the status as Inactive to prevent anyone from working in the company. With an Active Status, the company is ready for use. The Company Status can only be set by a System Administrator in this mode.
Company Constraints
Company Constraints are used to determine what can be done within a given company by all users. Constraints apply to ALL USERS in the company EXCEPT the System Administrator. The different Constraint settings are:
- Tag Kit – Limits user access to modifying content only and is used for demo kits for customers to try the system functionality with limited destructive capabilities.
- Sequence Experience Access with Read and Update – Limits users to changing what tags are assigned to as opposed to creating components.
- Full Access – Has no limitations and all users in the company can create, edit and delete all components.
The “Contact” section can be expanded and shrank by clicking on the word “Contact” or the dot to the left. Once expanded, the System Administrator can enter contact information for the company.
Company User Creation
The final step in Company Creation is adding any Users to the company. Click on “Users” or the circle to the left to expand the section if not already expanded.
NOTE – If you creating a company for the first time, you need to click the “Save” button at the upper right to save the company before adding users.
Click “+Create new” to add a new user to the company you are creating. If “+Create new” is greyed out or nothing happens when you click it, you haven’t saved the company yet. Click “Save” in the upper right and try again.
In the fields in the pop up box, enter the First Name, Last Name and Email address for the new User. It is important to get the e-mail address correct as the user will be e-mailed a welcome letter along with the details on how to login.
NOTE – AFTER ADDING A USER YOU MUST CLICK “Save” IN THE UPPER RIGHT HAND CORNER TO SAVE THE ADDED USER. IF YOU DON’T SAVE, THE USER WILL NOT BE CREATED.
