From the Template Panel, you can edit many aspects of a template including the Template Footer.
The Template Footer defines what happens in the bottom section of your Template and Experience.
Footer Customization
There are three tabs at the top of the top of the Footer Customization section: General, Text and Image.
Footer Customization – General Tab
Under the General tab, you can adjust overall configuration and format details for the footer of your Experience.

Footer Height
Under Footer Height, you determine the size of your footer relative to the screen of the device that will display it. There are three options:
Auto – will determine the size of the footer based on the contents that you add to the header. If you add a lot of text of a large logo, then the footer will be adjusted to hold all of the contents.
Pro Tip – Adding too much information to the Footer will lead important content only being reached by scrolling on a mobile phone which can limit the effectiveness of your Experience.
20% – This will allocate 20% of the screen size for the footer and only use that much data for the content.
40% – This will allocate 40% of the screen size for the footer and only use that much data for the content.
Content Position
This setting determines the position of the content within the Footer itself. You can choose Top, Middle and Bottom. Based on this setting any images or text will be positioned in that part of the footer.
Upload Footer Background Image
With this function you can upload a background image FOR THE FOOTER ONLY. By clicking on the link, you can upload an image that will de displayed behind the Footer.
This function allows you to format the Footer background to provide an appropriate background for a logo or text while leaving the rest of the template background more plain for other content or information.
Our recommendation is to upload an image in .png or .svg format (no less than 250 pixels).
The system adapts any image size to the scale of the template. The higher resolution of the picture, the better result of future experience.
Choose Footer Background Color
Footer Customization – Text Tab
In the Text Tab you can specify text that should be included in the Footer.
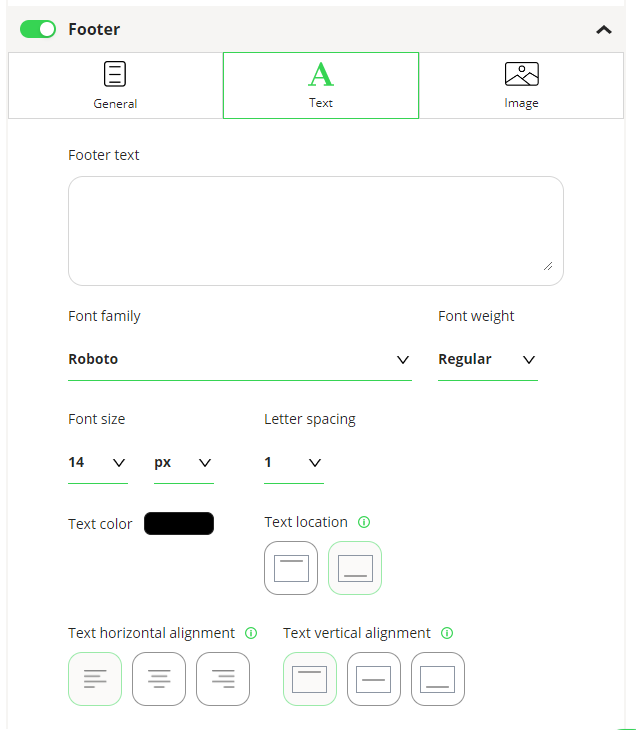
Footer Text
You can type any text in this field to be shown in the Footer of the Template. Too much text will lead to scrolling in the header of the Experience which can limit the effectiveness of the content.
Font Family
The Font Family that will be used for the Footer Text.
Font Weight
You have four choices of Font Weight that will change the look of your font: thin, regular, medium and bold. You will select the type you want from the dropdown.
Font Size
You can choose a number from the left dropdown and then a measurement from the right drop down. Measurements include: PX-pixels, PT-point and others. Changing these values will change the size of the fonts in the Footer.
Letter Spacing
This changes the amount of spacing between the letters in the text. The larger the number the more blank space between each letter.
Text Location
The location of the text within the Footer Window. Choices are Above or Below any image in the Footer.
Text Alignment
You can choose Left Aligned, Centered, or Right Aligned for the test in the Footer.
Text Color
Select the Color for any Text in the Footer using the Color Picker.
Footer Customization – Image Tab
In the Image tab, you are loading and defining how an image will be displayed IN THE FOOTER ONLY.
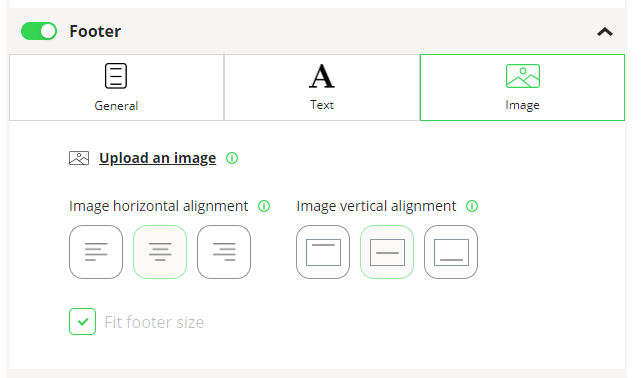
Upload an Image
Click “Upload an image” to load an image from your local machine.
Our recommendation is to upload an image in .png or .svg format (no less than 250 pixels).
The system adapts any image size to the scale of the template. The higher resolution of the picture, the better result of future experience.
Image Alignment
You can decide if the image will be placed in the Footer in one of three alignments: Left, Center or Right.
Pro Tip – There are a variety of ways to achieve the look that you want in the Footer of your template. Depending on the characteristics of your images, text and overall goals, the software is flexible enough to support most options. You may not need some of the configuration options for a particular implementation so do not think that you have to use every setting.